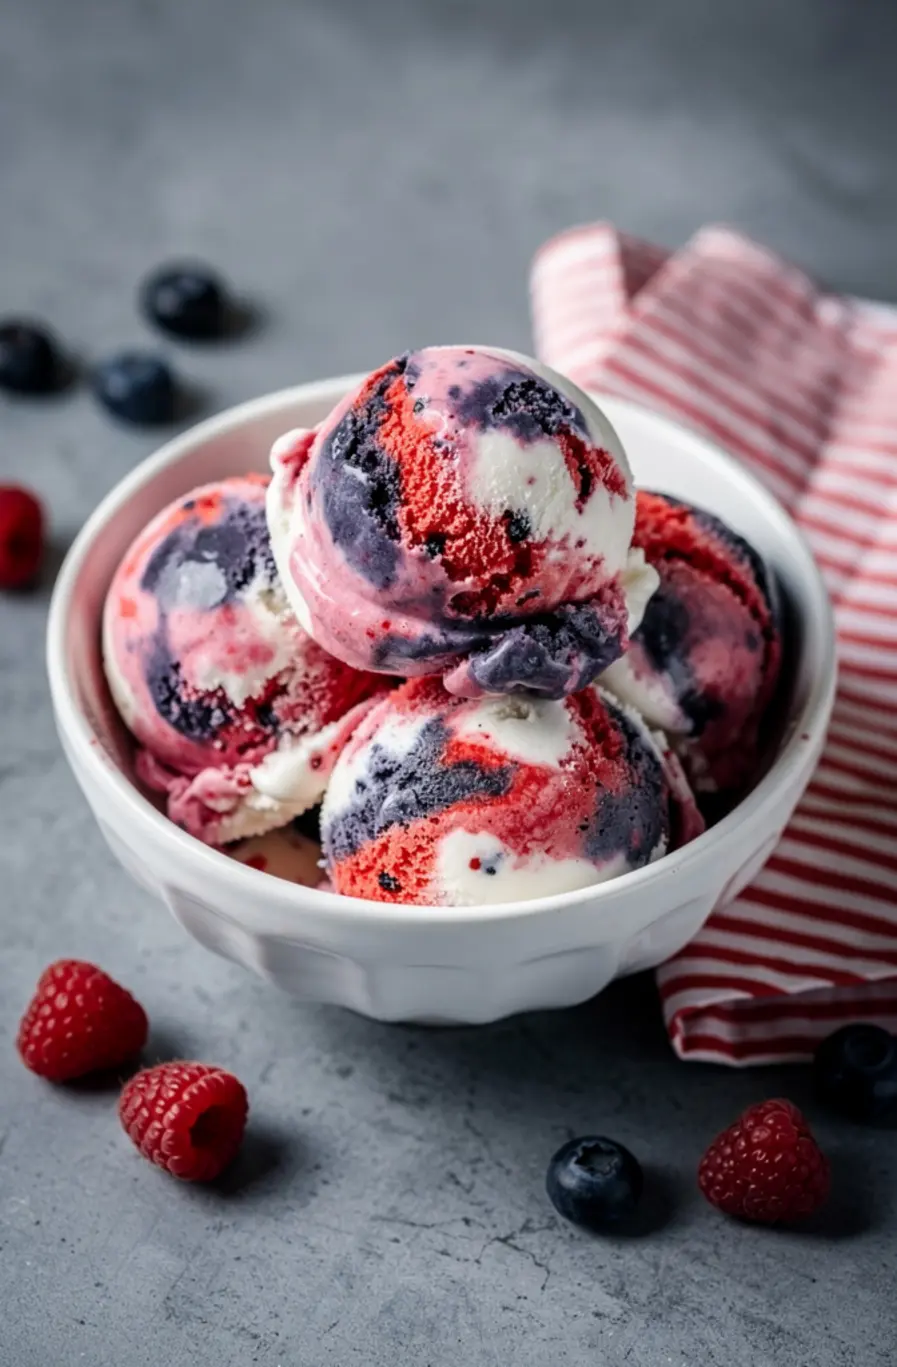
Easy Festive 4th Of July No-Churn Red White & Blue Swirl Ice Cream Recipe (3 Ingredients) In 390 Minutes!
Why I Created This 4th Of July No-Churn Red White & Blue Swirl Ice Cream Recipe (3 Ingredients)
Growing up, the 4th of July was always one of my favorite holidays. My family would gather in the backyard, grill burgers and hot dogs, and set off sparklers as the sun went down. But the real magic happened when dessert time rolled around. My mom would pull out all the stops—flag cakes, berry trifles, and, if we were lucky, homemade ice cream. The problem? Making ice cream from scratch was a labor of love, and it often felt like a marathon rather than a fun holiday activity.
As I got older and started hosting my own celebrations, I knew I wanted to recreate that same festive spirit but without the stress. I experimented with no-churn ice cream recipes, playing around with flavors and colors until I landed on this 4th Of July No-Churn Red White & Blue Swirl Ice Cream. It’s simple, it’s stunning, and it tastes like a little slice of summer. The best part? It only requires three core ingredients, and you don’t need any fancy equipment to make it. Just a bowl, a whisk, and a little creativity.
This recipe was born out of a desire to make holiday desserts accessible to everyone, whether you’re a seasoned baker or a complete beginner. It’s a celebration of simplicity, tradition, and the joy of sharing something homemade with the people you love. And honestly, there’s nothing quite like the look on someone’s face when you serve them a scoop of this vibrant, creamy ice cream. It’s like a little firework in every bite.
5 Reasons You Will Love This 4th Of July No-Churn Red White & Blue Swirl Ice Cream Recipe (3 Ingredients)
First, it’s incredibly easy to make. If you’ve ever been intimidated by the idea of making homemade ice cream, this recipe is for you. There’s no ice cream maker required, no complicated techniques, and no long list of ingredients. Just three core ingredients, a little mixing, and some patience while it freezes. It’s the perfect recipe for beginners or anyone who wants a stress-free dessert for their 4th of July celebration.
Second, it’s customizable. While this recipe is designed to be a patriotic red, white, and blue swirl, you can easily adapt it to fit any theme or occasion. Want to make a pastel version for Easter? Swap the colors. Planning a Halloween party? Go for orange, black, and purple. The possibilities are endless, and the base recipe is so simple that you can let your creativity run wild.
Third, it’s a crowd-pleaser. There’s something about ice cream that brings people together. Whether you’re serving it at a backyard barbecue, a family reunion, or a casual get-together with friends, this 4th Of July No-Churn Red White & Blue Swirl Ice Cream is guaranteed to be a hit. The vibrant colors make it feel special, and the creamy texture ensures that everyone will be coming back for seconds (or thirds).
Fourth, it’s budget-friendly. Homemade ice cream can often be expensive, especially if you’re buying specialty ingredients or investing in an ice cream maker. But this recipe keeps things simple and affordable. You probably already have most of the ingredients in your pantry, and the ones you don’t can be found at any grocery store for a reasonable price. It’s a great way to make a big impact without breaking the bank.
Fifth, it’s a fun activity to make with kids. If you’re looking for a way to keep the little ones entertained during your 4th of July celebrations, this recipe is a great option. They’ll love helping you mix the colors, layer the ice cream, and create the swirl effect. Plus, they’ll be so proud to see their hard work turn into a delicious dessert that everyone can enjoy. It’s a great way to create lasting memories and teach them a little bit about cooking in the process.
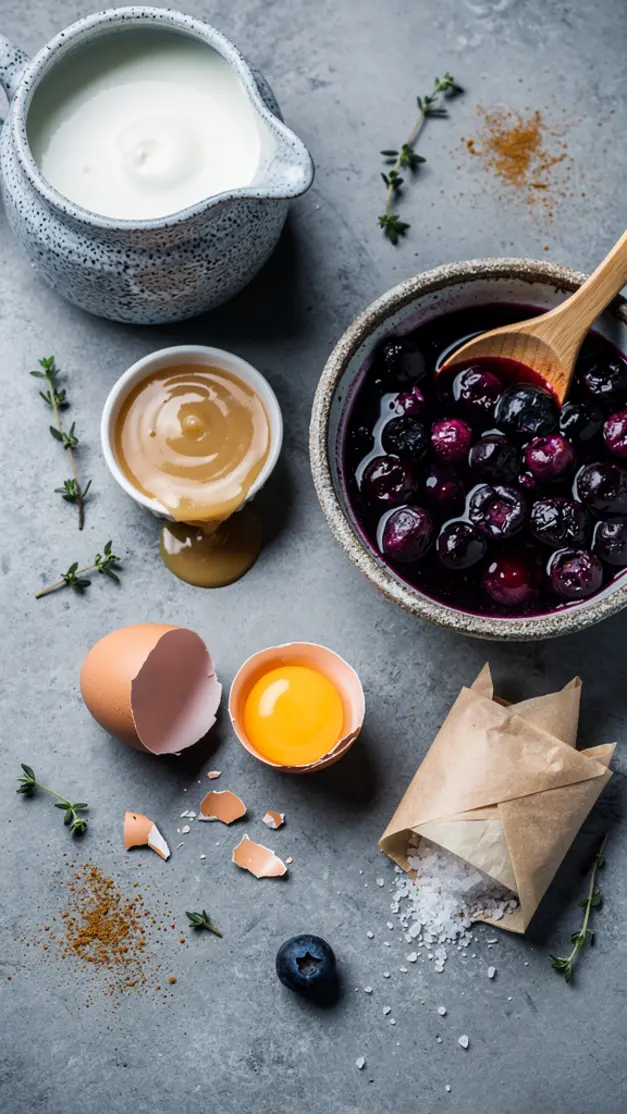
Ingredients for 4th Of July No-Churn Red White & Blue Swirl Ice Cream Recipe (3 Ingredients)
- 2 cups heavy whipping cream, cold
- 1 (14 oz) can sweetened condensed milk, chilled
- 1 teaspoon vanilla extract
- Red food coloring (gel or liquid)
- Blue food coloring (gel or liquid)
Substitutions: If you’re looking to make this recipe a little healthier or adapt it to dietary restrictions, there are a few substitutions you can try. For a lighter version, you can use whipped coconut cream instead of heavy whipping cream. Just make sure it’s well-chilled before whipping. If you’re avoiding dairy, you can also use a dairy-free sweetened condensed milk alternative. Keep in mind that the texture and flavor might vary slightly, but it’s a great option if you need it. For the food coloring, you can use natural alternatives like beet juice for red and butterfly pea flower powder for blue, though the colors may not be as vibrant.
Tools You Need to Make 4th Of July No-Churn Red White & Blue Swirl Ice Cream Recipe (3 Ingredients)
- Large mixing bowl
- Electric mixer (hand or stand)
- Rubber spatula
- Three small bowls (for dividing the mixture)
- Loaf pan or freezer-safe container (9×5-inch works well)
- Plastic wrap or parchment paper
How to Make 4th Of July No-Churn Red White & Blue Swirl Ice Cream Recipe (3 Ingredients) Step by Step
Step 1: Prepare Your Ingredients and Tools
Before you start, make sure all your ingredients are well-chilled. This is key to achieving stiff peaks when you whip the cream. I like to pop my mixing bowl and beaters in the freezer for about 10 minutes before I start. It makes a big difference in how quickly the cream whips up. While those are chilling, measure out your sweetened condensed milk and vanilla extract. You’ll also want to have your food coloring ready to go—gel food coloring works best for vibrant colors, but liquid will work in a pinch.
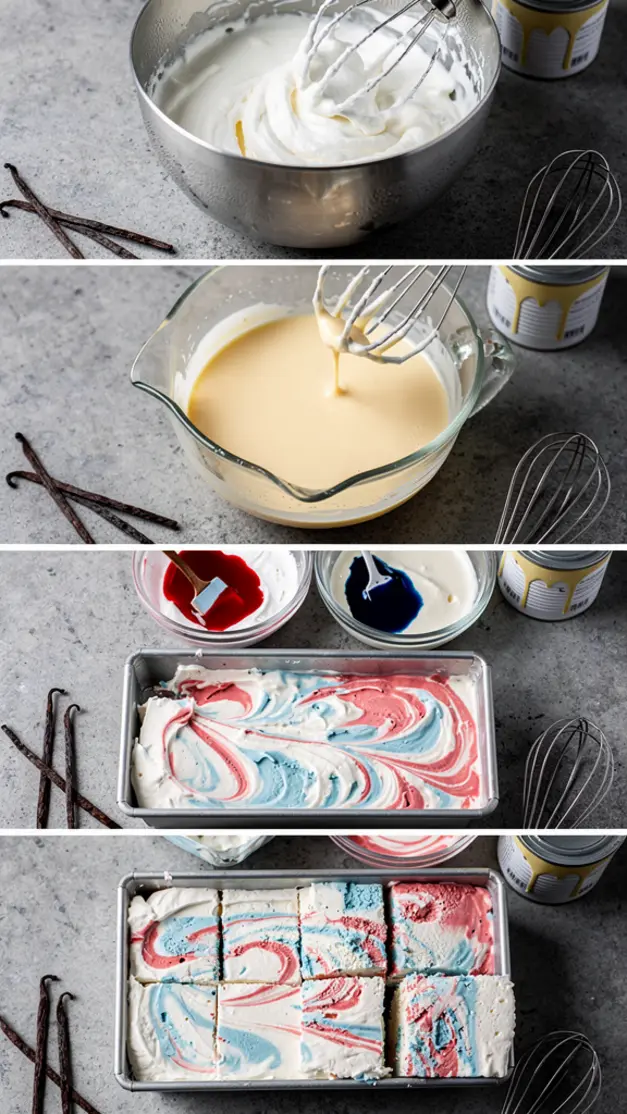
Step 2: Whip the Heavy Cream
In your chilled mixing bowl, pour in the cold heavy whipping cream. Using your electric mixer, beat the cream on medium-high speed until stiff peaks form. This usually takes about 3-5 minutes, depending on your mixer. You’ll know it’s ready when you can turn the beaters upside down and the cream holds its shape without drooping. Be careful not to overmix, or the cream can start to turn grainy. Once it’s ready, set it aside while you prepare the next step.
Step 3: Mix the Sweetened Condensed Milk and Vanilla
In a separate bowl, combine the sweetened condensed milk and vanilla extract. Stir until they’re fully mixed together. This mixture is the base of your ice cream, and it’s what gives it that rich, creamy sweetness. Once it’s combined, you’ll want to divide it into three equal parts. I usually use a measuring cup to make sure each portion is the same size. Pour each portion into its own small bowl—these will become your red, white, and blue layers.
Step 4: Add Food Coloring
Now comes the fun part—adding the colors! Take one of the small bowls of sweetened condensed milk mixture and stir in a few drops of red food coloring until you achieve a vibrant red hue. In another bowl, do the same with blue food coloring. The third bowl will stay white, so you don’t need to add anything to it. If you’re using gel food coloring, remember that a little goes a long way, so start with a small amount and add more as needed. You can always adjust the color, but you can’t take it out once it’s in!
Step 5: Fold the Colored Mixtures into the Whipped Cream
Here’s where the magic happens. Take one-third of your whipped cream and gently fold it into the red sweetened condensed milk mixture. Use a rubber spatula to fold it in until the color is evenly distributed and no streaks remain. Repeat this process with the blue mixture and another third of the whipped cream. The white mixture will get the remaining third of the whipped cream. Be gentle when folding to keep as much air in the mixture as possible—this is what gives your ice cream that light, creamy texture.
Step 6: Layer and Swirl the Ice Cream
Now it’s time to assemble your ice cream. Start by spooning the red mixture into your loaf pan or freezer-safe container. Spread it out evenly with your spatula. Next, add the white mixture on top of the red, spreading it out to cover the layer beneath. Finally, add the blue mixture on top of the white. Once all three layers are in the pan, use a butter knife or a skewer to gently swirl the colors together. You don’t want to overmix—just a few swirls here and there to create that beautiful marbled effect. Once you’re happy with the swirl, cover the pan with plastic wrap or parchment paper and pop it in the freezer.
Step 7: Freeze and Serve
Let the ice cream freeze for at least 6 hours, or overnight if possible. This gives it time to firm up and develop that perfect ice cream texture. When you’re ready to serve, let it sit at room temperature for about 5-10 minutes to soften slightly. This makes it easier to scoop and ensures you get those gorgeous swirls in every bite. Serve it up in bowls or cones, and watch as everyone marvels at your homemade 4th Of July No-Churn Red White & Blue Swirl Ice Cream!
My Pro Tips for the Best 4th Of July No-Churn Red White & Blue Swirl Ice Cream Recipe (3 Ingredients)
- Tip 1: Chill everything. I can’t stress this enough—cold ingredients and tools are the key to success with this recipe. Make sure your heavy whipping cream, sweetened condensed milk, mixing bowl, and beaters are all well-chilled before you start. This helps the cream whip up faster and hold its shape better, giving you that perfect ice cream texture.
- Tip 2: Don’t overmix the whipped cream. When you’re whipping the heavy cream, keep a close eye on it. You want stiff peaks, but if you whip it too much, it can start to turn grainy or even turn into butter. Stop mixing as soon as the cream holds its shape when you lift the beaters. It’s better to undermix slightly than to overdo it.
- Tip 3: Use gel food coloring for vibrant colors. If you want those red, white, and blue layers to really pop, gel food coloring is the way to go. It’s more concentrated than liquid food coloring, so you’ll need less of it to achieve bright, vibrant hues. Plus, it won’t thin out your mixture like liquid food coloring can. If you don’t have gel food coloring on hand, liquid will work, but you might need to use a bit more to get the same intensity.
- Tip 4: Slightly soften the ice cream before swirling. If you find that your ice cream layers are too firm to swirl easily, let them sit at room temperature for a few minutes before you start. This will soften them just enough to make swirling a breeze. You don’t want them to melt, but a little softness will help you achieve that beautiful marbled effect without overmixing.
- Tip 5: Get creative with your swirls. There’s no right or wrong way to swirl your ice cream—it’s all about what looks good to you! You can go for a subtle marbled effect or a bold, dramatic swirl. I like to use a butter knife to create big, swooping motions, but you can also use a skewer or even a spoon. Have fun with it and make it your own!
- Tip 6: Let the ice cream soften before serving. No-churn ice cream can be quite firm straight out of the freezer, so it’s important to let it sit at room temperature for about 5-10 minutes before scooping. This makes it easier to serve and ensures that you get those gorgeous swirls in every bite. If you’re serving it at a party, you can take it out of the freezer a little ahead of time so it’s ready to go when your guests are.
Delicious Variations of 4th Of July No-Churn Red White & Blue Swirl Ice Cream Recipe (3 Ingredients)
- Berry Swirl: Add a layer of crushed berries between the red, white, and blue layers for extra texture and flavor. Strawberries, raspberries, or blueberries would all work beautifully. Just make sure to drain any excess liquid from the berries before adding them to the ice cream to prevent iciness.
- Cookie Crumble: Mix in crushed cookies or graham crackers between the layers for a fun crunch. Oreos, vanilla wafers, or even shortbread cookies would be delicious. You can also sprinkle some on top before freezing for a pretty garnish.
- Chocolate Drizzle: Swap the vanilla extract for almond or coconut extract, then drizzle melted chocolate between the layers. This adds a rich, decadent touch to the ice cream and pairs perfectly with the sweet, creamy base. Dark, milk, or white chocolate would all work well.
- Dairy-Free Version: Use coconut cream instead of heavy whipping cream and a dairy-free sweetened condensed milk alternative. The texture might be slightly different, but it’s a great option if you’re avoiding dairy. You can also add a splash of coconut extract for extra flavor.
- Boozy Twist: For an adults-only version, add a splash of your favorite liquor to the sweetened condensed milk mixture. Bourbon, rum, or vodka would all work well. Just keep in mind that alcohol lowers the freezing point of the ice cream, so it might be a little softer than the non-alcoholic version.
- Fruit Puree: Swirl in a layer of fruit puree between the colors for a burst of natural sweetness. Mango, peach, or passionfruit puree would all be delicious. Just make sure to strain out any seeds or pulp before adding it to the ice cream.
What to Serve With 4th Of July No-Churn Red White & Blue Swirl Ice Cream Recipe (3 Ingredients)
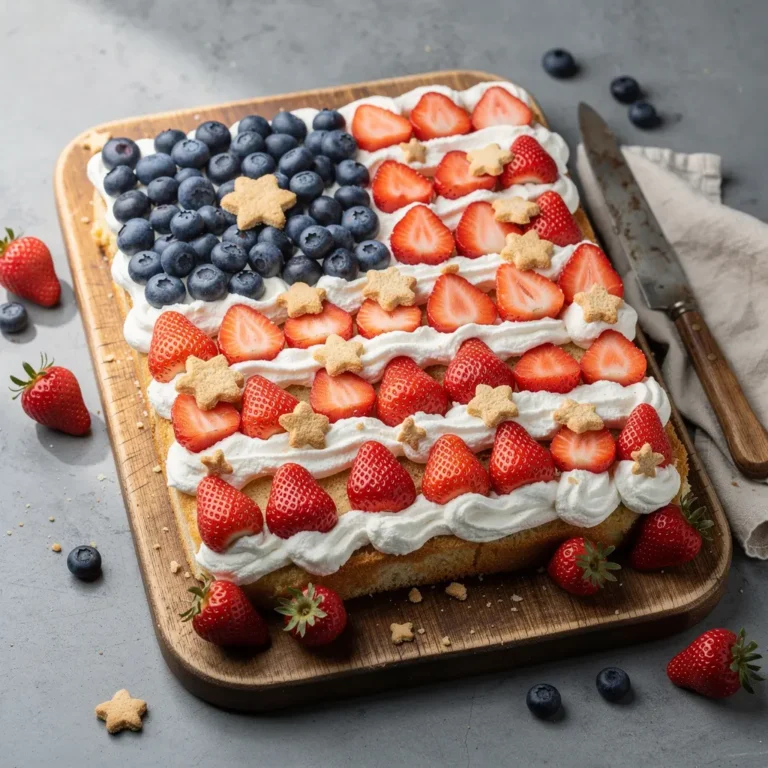
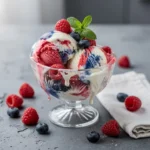
This ice cream is delicious on its own, but it’s even better when paired with other festive treats. For a classic 4th of July dessert spread, serve it alongside a slice of flag cake or a berry trifle. The combination of creamy ice cream and light, fruity cake is always a hit. You can also set up an ice cream sundae bar with toppings like sprinkles, crushed cookies, chocolate sauce, and fresh berries. Let your guests customize their sundaes for a fun, interactive dessert experience.
If you’re serving this ice cream at a barbecue or picnic, pair it with some classic summer sides like grilled corn, potato salad, or coleslaw. The sweet, creamy ice cream is the perfect contrast to savory, smoky flavors. For drinks, lemonade, iced tea, or a fruity sangria would all be refreshing choices. And if you’re feeling extra festive, you can even serve the ice cream in waffle cones or as part of a red, white, and blue parfait with layers of whipped cream and berries.
How to Store Leftover 4th Of July No-Churn Red White & Blue Swirl Ice Cream Recipe (3 Ingredients)
If you’re lucky enough to have leftovers, storing this ice cream is a breeze. Transfer it to an airtight container and cover it with a piece of plastic wrap or parchment paper pressed directly onto the surface of the ice cream. This helps prevent ice crystals from forming. Store it in the freezer for up to 2 weeks. When you’re ready to serve it again, let it sit at room temperature for about 5-10 minutes to soften slightly before scooping.
If you notice that the ice cream has become too hard or icy after storing, you can revive it by letting it sit at room temperature for a bit longer or by giving it a quick stir with a spatula before serving. This helps redistribute the air and moisture, giving it a creamier texture. Just be careful not to overmix, or you’ll lose those beautiful swirls.
Frequently Asked Questions About 4th Of July No-Churn Red White & Blue Swirl Ice Cream Recipe (3 Ingredients)
- Can I make this ice cream ahead of time? Absolutely! This is the perfect make-ahead dessert. You can prepare it up to 2 weeks in advance and store it in the freezer until you’re ready to serve. Just make sure to cover it well to prevent freezer burn.
- Can I use low-fat or light ingredients? I don’t recommend it. The heavy whipping cream and sweetened condensed milk are what give this ice cream its rich, creamy texture. Using low-fat or light alternatives can result in a icier, less creamy product. If you’re looking for a lighter option, you can try using whipped coconut cream instead of heavy whipping cream, but keep in mind that the texture might be slightly different.
- Why is my ice cream icy? Icy ice cream is usually a result of too much air being incorporated into the mixture or not enough fat. To prevent this, make sure you’re not overmixing the whipped cream, and be gentle when folding in the sweetened condensed milk. Also, make sure your ingredients are well-chilled before you start—this helps create a smoother texture.
- Can I make this recipe without food coloring? Yes, you can! If you prefer to avoid food coloring, you can use natural alternatives like beet juice for red and butterfly pea flower powder for blue. Keep in mind that the colors might not be as vibrant, but they’ll still be beautiful. You can also skip the coloring altogether and make a simple vanilla ice cream with berry swirls for a more natural look.
- How do I get the perfect swirl? The key to a beautiful swirl is to slightly soften the ice cream layers before you start. If they’re too firm, the colors won’t blend together smoothly. You can also use a butter knife or skewer to create big, swooping motions for a dramatic effect. Don’t overmix—just a few swirls here and there is all you need.
- Can I use this recipe to make other flavors? Definitely! This no-churn ice cream base is incredibly versatile. You can swap the vanilla extract for other flavors like almond, coconut, or even peppermint. You can also add mix-ins like chocolate chips, crushed cookies, or fruit puree. The possibilities are endless, so don’t be afraid to get creative!
The Story Behind My 4th Of July No-Churn Red White & Blue Swirl Ice Cream Recipe (3 Ingredients)
I’ll never forget the first time I made this ice cream. It was the summer after I graduated from college, and I was hosting my first 4th of July party. I wanted to create something special, something that would wow my friends and make the day feel extra festive. But I was also on a tight budget and didn’t have a lot of time to spare. I had seen no-churn ice cream recipes online and decided to give it a try, but I wanted to make it my own.
I spent the morning experimenting with different colors and techniques, trying to get the swirl just right. I must have gone through half a dozen batches before I landed on the perfect combination. When my friends arrived that evening, I was nervous but excited to serve them my creation. The look on their faces when I brought out the ice cream was priceless—it was like I had just performed a magic trick. They couldn’t believe how easy it was to make, and they kept coming back for more.
Since then, this 4th Of July No-Churn Red White & Blue Swirl Ice Cream has become a staple in my holiday celebrations. It’s a recipe that’s close to my heart because it reminds me of that first party, of the joy of creating something from scratch, and of the simple pleasure of sharing good food with good people. Every time I make it, I think about how far I’ve come since that summer, and how much I’ve learned about cooking, hosting, and the power of a great dessert.
This recipe is more than just a treat—it’s a celebration of tradition, creativity, and the joy of making memories with the people you love. Whether you’re hosting a big party or just enjoying a quiet evening at home, I hope it brings a little extra magic to your 4th of July.
Pin This 4th Of July No-Churn Red White & Blue Swirl Ice Cream Recipe (3 Ingredients) Recipe for Later
I hope this recipe brings as much joy to your 4th of July celebrations as it has to mine. It’s the perfect blend of easy, festive, and delicious—everything you want in a holiday dessert. Whether you’re making it for a big party or just treating yourself to a scoop or two, I know you’ll love it. And the best part? You can make it ahead of time, so you can spend less time in the kitchen and more time enjoying the day with your loved ones.
So go ahead, give it a try! Gather your ingredients, put on some patriotic music, and get ready to create something truly special. And when you do, I’d love to hear how it turns out. Leave a comment below or tag me in your photos—I always love seeing your creations. Happy 4th of July, and happy ice cream making!
4th Of July No-Churn Red White & Blue Swirl Ice Cream Recipe (3 Ingredients)
Ingredients
- 2 cups heavy whipping cream, cold
- 1 (14 oz) can sweetened condensed milk
- 1 teaspoon vanilla extract
- 0.5 teaspoon red gel food coloring
- 0.5 teaspoon blue gel food coloring
Instructions
- Prep the Base: In a large chilled mixing bowl, beat the cold heavy whipping cream with an electric mixer on high speed until stiff peaks form, about 3-4 minutes. Be careful not to overbeat.
- Add Flavor: Gently fold in the sweetened condensed milk and vanilla extract until fully combined. The mixture should be smooth and creamy.
- Divide the Mixture: Split the ice cream base evenly into three separate bowls. Leave one bowl plain (white). Add red gel food coloring to the second bowl and blue gel food coloring to the third bowl. Gently fold each until the color is evenly distributed.
- Layer the Colors: Line a loaf pan or freezer-safe container with parchment paper. Spoon the red, white, and blue mixtures into the pan in alternating layers. Use a knife or skewer to gently swirl the colors together for a marbled effect.
- Freeze: Cover the pan with plastic wrap or a lid and freeze for at least 6 hours, or until firm. For best results, freeze overnight.
- Serve: Once frozen, scoop the ice cream into bowls or cones and enjoy your festive 4th Of July No-Churn Red White & Blue Swirl Ice Cream!