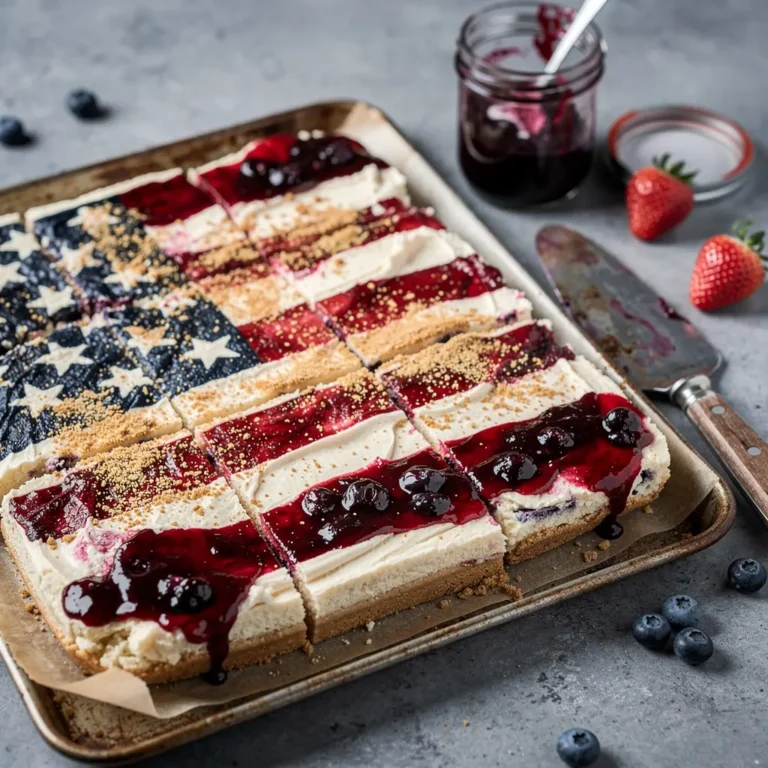
Festive Ultimate 4th of July Flag Cake Charcuterie Board Recipe In 60 Minutes!

Why I Created This 4th of July Flag Cake Charcuterie Board Recipe
Every year, my family gathers for a big 4th of July picnic, and dessert is always the highlight. We’ve tried everything—cupcakes, pies, even a giant cookie—but nothing felt quite right for our crowd. Last summer, I wanted something that was festive, shareable, and a little unexpected. That’s when the idea struck me: why not combine a classic flag cake with the fun of a charcuterie board?
The first time I made this, I was nervous. Would people get it? Would it be too messy? But the moment I set it down on the table, the reaction was priceless. Kids immediately started grabbing berries and whipped cream, while the adults admired the presentation. It was a hit, and now it’s become our new tradition. There’s something magical about watching everyone build their own plates, mixing and matching flavors to their liking.
This recipe is my love letter to summer, to family, and to the joy of celebrating together. It’s not just a dessert—it’s an experience. And the best part? It’s so simple to put together, even if you’re not a baking pro. You’ll have a stunning, crowd-pleasing dessert in no time.
5 Reasons You Will Love This 4th of July Flag Cake Charcuterie Board Recipe
First, it’s a showstopper. This isn’t just another cake—it’s a conversation piece. The moment you bring it out, your guests will be impressed by the creative presentation. It’s the kind of dessert that makes people pull out their phones to take pictures before they even take a bite.
Second, it’s interactive. Unlike a traditional cake, this charcuterie-style board invites everyone to serve themselves. Kids and adults alike will love picking out their favorite berries, dollops of whipped cream, and even a few extra sprinkles. It turns dessert into a fun, hands-on activity.
Third, it’s customizable. You can swap out ingredients based on what’s in season or what your family loves. Don’t like strawberries? Use raspberries instead. Want a denser cake? Try a pound cake base. The possibilities are endless, and that’s what makes this recipe so versatile.
Fourth, it’s easy to make. I know what you’re thinking: “This looks complicated.” But I promise, it’s not. The cake comes together quickly, and the assembly is foolproof. Even if you’re not a baker, you can pull this off with confidence. I’ll walk you through every step so you feel like a pro.
Fifth, it’s perfect for a crowd. Whether you’re hosting a small gathering or a big party, this dessert serves 12-15 people with ease. Plus, it’s easy to transport—just assemble the board at home and bring it to your picnic or potluck. No last-minute stress required.
Ingredients for 4th of July Flag Cake Charcuterie Board Recipe
- 2 boxes vanilla cake mix (plus ingredients listed on the box: eggs, oil, water)
- 1 cup unsalted butter, softened
- 4 cups powdered sugar
- 1/4 cup heavy cream
- 1 tsp vanilla extract
- 1/2 tsp salt
- 4 cups fresh strawberries, hulled and sliced
- 2 cups fresh blueberries
- 2 cups fresh raspberries
- 1 cup white chocolate chips, melted
- 1 cup red, white, and blue sprinkles
- 2 cups whipped cream (store-bought or homemade)
- 1/2 cup sliced almonds (optional, for garnish)
- 1/4 cup honey (optional, for drizzling)
- 1/2 cup mini marshmallows (optional, for decoration)
- 1/2 cup crushed graham crackers (optional, for texture)
- 1/2 cup shredded coconut (optional, for garnish)
- 1/2 cup white chocolate stars (optional, for decoration)
Substitutions: If you’re short on time, you can use a store-bought vanilla cake instead of baking from scratch. For a lighter option, swap the buttercream frosting for a cream cheese frosting. If you can’t find fresh berries, frozen berries work in a pinch—just thaw and drain them well before using. And if you’re not a fan of whipped cream, vanilla ice cream makes a great alternative.

Tools You Need to Make 4th of July Flag Cake Charcuterie Board Recipe
- Two 9×13-inch baking pans
- Mixing bowls
- Electric mixer
- Spatula
- Cooling rack
- Serrated knife
- Large wooden or acrylic charcuterie board (at least 18×24 inches)
- Piping bag with star tip (optional, for whipped cream)
- Small bowls for toppings
- Measuring cups and spoons
How to Make 4th of July Flag Cake Charcuterie Board Recipe Step by Step
Step 1: Bake the Cake Layers
First, preheat your oven to 350°F (175°C) and grease two 9×13-inch baking pans. Prepare the vanilla cake mix according to the package instructions, dividing the batter evenly between the two pans. Bake for 25-30 minutes, or until a toothpick inserted into the center comes out clean. Let the cakes cool completely in the pans before moving on to the next step.
While the cakes are baking, you can start preparing the other components. Hull and slice the strawberries, rinse the blueberries and raspberries, and set them aside. If you’re using any optional toppings like melted white chocolate or sprinkles, get those ready too.
Step 2: Make the Buttercream Frosting
In a large mixing bowl, beat the softened butter until creamy. Gradually add the powdered sugar, heavy cream, vanilla extract, and salt. Mix on low speed until combined, then increase the speed to medium and beat for 2-3 minutes, until light and fluffy. Taste and adjust the sweetness or consistency if needed—you can add more powdered sugar for thickness or more cream for a smoother texture.
Once the frosting is ready, set it aside. If you’re not using it immediately, cover the bowl with plastic wrap to prevent it from drying out. You’ll need this to frost the cake layers and add decorative touches to the board.
Step 3: Assemble the Cake Layers
Once the cakes are completely cool, use a serrated knife to level the tops if they’ve domed. Place one cake layer on a large cutting board or tray. Spread a thin layer of buttercream frosting over the top—this will act as a “glue” to hold the second layer in place. Carefully place the second cake layer on top and press down gently.
Now, it’s time to create the flag design. Using the serrated knife, cut the cake into three equal rectangles. You’ll have one rectangle for the blue “field” of stars and two rectangles for the red and white stripes. Don’t worry about perfection—this is a rustic dessert, and a little imperfection adds to the charm.
Step 4: Frost the Cake
Spread a thin layer of buttercream frosting over the top and sides of each cake rectangle. This doesn’t need to be perfect—it’s just a crumb coat to seal in the moisture. Place the frosted cake rectangles in the refrigerator to chill for about 15 minutes. This will make it easier to add the final layer of frosting.
After chilling, spread a second, thicker layer of buttercream over each rectangle. Use a spatula to create smooth, even layers. If you want to get fancy, you can use the spatula to create texture or swirls in the frosting. Once you’re happy with the frosting, return the cakes to the refrigerator while you prepare the berries.
Step 5: Prepare the Berries for the Flag Design
While the cake is chilling, arrange the berries for the flag design. On a large baking sheet lined with parchment paper, create rows of strawberries and raspberries to mimic the red and white stripes of the American flag. Start with a row of strawberries, followed by a row of raspberries, and repeat until you’ve used all the berries. This step makes it easier to transfer the berries to the cake later.
For the blue “field” of stars, arrange the blueberries in a square on the baking sheet. You can create a star pattern if you’re feeling artistic, or just scatter them randomly. If you’re using white chocolate stars or sprinkles, add those to the blueberry section now.
Step 6: Assemble the Flag Cake on the Board
Take the chilled cake rectangles out of the refrigerator. Place the largest rectangle on your charcuterie board—this will be the base of your flag. Arrange the other two rectangles on top to complete the flag shape. If needed, use a little extra buttercream to “glue” the pieces together.
Now, it’s time to add the berries. Using the baking sheet as a guide, carefully transfer the rows of strawberries and raspberries onto the cake to create the red and white stripes. Start at the top and work your way down, pressing the berries gently into the frosting so they stick. For the blue “field,” transfer the blueberries to the top-left corner of the cake.
Step 7: Add the Finishing Touches
Once the berries are in place, it’s time to add the rest of the toppings. Fill small bowls with whipped cream, sprinkles, sliced almonds, mini marshmallows, and any other optional toppings you’re using. Arrange these around the cake on the board, leaving space for guests to serve themselves.
If you’re using a piping bag, pipe small dollops of whipped cream around the board for a decorative touch. Drizzle honey over the berries or sprinkle crushed graham crackers for extra texture. The goal is to make the board look abundant and inviting—like a dessert buffet!
Step 8: Serve and Enjoy
Once everything is assembled, your 4th of July Flag Cake Charcuterie Board is ready to serve. Place it in the center of your table and let everyone dig in. Encourage your guests to build their own plates, mixing and matching their favorite toppings. This dessert is all about fun, so don’t be afraid to get creative with how you serve it.
Leftovers can be stored in the refrigerator, but I doubt there will be any. This dessert disappears fast!

My Pro Tips for the Best 4th of July Flag Cake Charcuterie Board Recipe
- Chill the cake layers before assembling: This makes it much easier to slice the cake into rectangles without crumbling. Pop them in the fridge for at least 30 minutes before cutting.
- Use a serrated knife for clean cuts: A serrated knife glides through the cake more smoothly than a straight-edged knife, giving you cleaner lines for the flag design.
- Arrange berries on a baking sheet first: This step might seem extra, but it saves so much time. You can create the flag pattern on the sheet, then transfer it to the cake in one go.
- Keep whipped cream cold until ready to use: Whipped cream can melt quickly, especially in warm weather. Keep it in the fridge until the last minute, and consider placing the bowl in a larger bowl of ice to keep it cool while serving.
- Add a variety of textures: The more textures you include—creamy whipped cream, crunchy almonds, chewy marshmallows—the more interesting the dessert becomes. Don’t be afraid to mix it up!
- Make it ahead of time: You can bake the cake layers and prepare the frosting a day in advance. Store the cake layers at room temperature, wrapped in plastic wrap, and keep the frosting in the fridge. Assemble the board the day of your event.
Delicious Variations of 4th of July Flag Cake Charcuterie Board Recipe
- Raspberry Flag Cake: Swap the strawberries for raspberries to create a deeper red color. This variation is perfect if you prefer a tart berry flavor over the sweetness of strawberries.
- Pound Cake Base: Use a pound cake instead of vanilla cake for a denser, richer texture. Pound cake holds up well to toppings and is a great option if you want something less sweet.
- Gluten-Free Version: Use a gluten-free vanilla cake mix and ensure all your toppings are gluten-free. This variation is great for guests with dietary restrictions.
- Chocolate Flag Cake: Add cocoa powder to the cake batter for a chocolate twist. Use white chocolate chips and whipped cream for the “stars” and strawberries for the stripes. It’s a fun, unexpected take on the classic flag cake.
- No-Bake Cheesecake Flag: Skip the cake altogether and use a no-bake cheesecake as the base. Spread the cheesecake in a rectangle on the board, then top with berries and whipped cream for a creamy, dreamy dessert.
- Tropical Flag Cake: Add shredded coconut, pineapple chunks, and kiwi slices to the board for a tropical twist. This variation is perfect for summer and adds a fun, unexpected flavor.
What to Serve With 4th of July Flag Cake Charcuterie Board Recipe
This dessert is a star on its own, but pairing it with the right sides and drinks can take your 4th of July spread to the next level. For a classic picnic vibe, serve it with grilled burgers, hot dogs, and a big bowl of potato salad. The sweetness of the cake balances the savory flavors of the main dishes perfectly.
If you’re hosting a more upscale gathering, pair the cake with a charcuterie board of cheeses, cured meats, and crackers. The contrast between the rich, savory board and the light, fruity dessert is divine. For drinks, lemonade, iced tea, or a sparkling fruit punch are all great options. If you’re serving alcohol, a rosé or a light white wine complements the berries beautifully.
Don’t forget the little extras that make a party special. Set out festive plates and napkins in red, white, and blue, and add some patriotic decorations like mini flags or sparklers. The more festive the atmosphere, the more fun your guests will have.
How to Store Leftover 4th of July Flag Cake Charcuterie Board Recipe
If you’re lucky enough to have leftovers, store them in the refrigerator for up to 2 days. Cover the board with plastic wrap or transfer the remaining cake and toppings to airtight containers. The cake will stay fresh, but the berries might release some juice, so it’s best to eat it sooner rather than later.
To reheat (if you want to serve the cake warm), pop individual slices in the microwave for 10-15 seconds. This will soften the frosting slightly and make it taste freshly baked. However, I recommend serving the cake at room temperature for the best texture and flavor.
Unfortunately, this dessert doesn’t freeze well. The berries and whipped cream can become soggy once thawed, so it’s best to enjoy it fresh. If you have extra cake layers, you can freeze those before assembling the board—just wrap them tightly in plastic wrap and store them in the freezer for up to 3 months.
Frequently Asked Questions About 4th of July Flag Cake Charcuterie Board Recipe
- Can I make this recipe ahead of time? Absolutely! You can bake the cake layers and prepare the frosting a day in advance. Store the cake layers at room temperature, wrapped in plastic wrap, and keep the frosting in the fridge. Assemble the board the day of your event to keep everything fresh.
- What if I don’t have a charcuterie board? No problem! You can use a large platter, a baking sheet, or even a clean countertop. The key is to have a flat surface where you can arrange the cake and toppings in an inviting way.
- Can I use frozen berries? Yes, but make sure to thaw and drain them well before using. Frozen berries can release a lot of juice, which might make the cake soggy. Pat them dry with a paper towel before arranging them on the board.
- How do I keep the whipped cream from melting? Keep the whipped cream in the refrigerator until the last minute. If you’re serving outdoors, place the bowl of whipped cream in a larger bowl of ice to keep it cool. You can also use stabilized whipped cream, which holds its shape longer.
- Can I make this recipe gluten-free? Yes! Use a gluten-free vanilla cake mix and ensure all your toppings are gluten-free. Double-check labels on ingredients like sprinkles and white chocolate chips to make sure they’re safe for gluten-free diets.
- What’s the best way to transport this dessert? Assemble the board at home, then carefully place it in a large, flat container or on a sturdy tray. If you’re driving, place the board on the floor of your car to prevent it from sliding around. Once you arrive, give it a quick touch-up before serving.
- Can I use a different type of cake? Of course! This recipe is very flexible. You can use chocolate cake, pound cake, or even a store-bought cake. Just make sure it’s sturdy enough to hold the toppings.
The Story Behind My 4th of July Flag Cake Charcuterie Board Recipe
I’ll never forget the first time I made this dessert. It was the summer of 2022, and my family was hosting our annual 4th of July picnic. We had all the classics—burgers, hot dogs, potato salad—but I wanted something special for dessert. I’d seen charcuterie boards everywhere, and I loved the idea of turning a flag cake into something interactive. So, I decided to give it a try.
I spent the morning baking the cake layers, whipping up the frosting, and arranging the berries. When I finally set the board on the table, my family’s reaction was priceless. My niece immediately grabbed a handful of strawberries, while my dad joked that he was going to eat the entire “flag” himself. The best part was watching everyone build their own plates, mixing and matching flavors to their liking. It was a hit, and it’s been our go-to dessert ever since.
What I love most about this recipe is how it brings people together. It’s not just a dessert—it’s an experience. Whether you’re hosting a big party or a small gathering, this 4th of July Flag Cake Charcuterie Board is sure to be a conversation starter. It’s a reminder that the best moments are the ones we share with the people we love.
This year, I’m making it again, and I can’t wait to see the smiles on my family’s faces. I hope it becomes a tradition for you too. Happy 4th of July!
Pin This 4th of July Flag Cake Charcuterie Board Recipe for Later
I hope this recipe brings as much joy to your 4th of July celebration as it has to mine. Whether you’re hosting a big party or a small gathering, this dessert is sure to impress. Don’t forget to save this recipe so you can make it year after year—it’s a keeper!
If you try this recipe, I’d love to hear how it turns out. Leave a comment below or tag me in your photos. Happy baking, and have a wonderful Independence Day!

4th of July Flag Cake Charcuterie Board Recipe
Ingredients
- 2 cups all-purpose flour
- 2 teaspoons baking powder
- 1/2 teaspoon salt
- 1/2 cup unsalted butter, softened
- 1 cup granulated sugar
- 2 large eggs
- 2 teaspoons vanilla extract
- 1/2 cup whole milk
- 2 cups heavy whipping cream
- 1/4 cup powdered sugar
- 1 teaspoon vanilla extract
- 2 cups fresh blueberries
- 4 cups fresh strawberries, hulled and sliced
- 1 cup white chocolate chips
- 1 cup mini marshmallows
- 1 cup red licorice twists
- 1 cup vanilla wafer cookies
- 1/2 cup shredded coconut, toasted
Instructions
- Prep the Cake: Preheat oven to 350°F (175°C). Grease and line two 8-inch round cake pans with parchment paper.
- Mix Dry Ingredients: In a medium bowl, whisk together flour, baking powder, and salt. Set aside.
- Cream Butter and Sugar: In a large bowl, beat softened butter and granulated sugar until light and fluffy, about 3 minutes.
- Add Eggs and Vanilla: Beat in eggs one at a time, then add vanilla extract. Mix until combined.
- Combine Wet and Dry: Alternate adding dry ingredients and milk to the butter mixture, beginning and ending with dry ingredients. Mix just until combined.
- Bake Cakes: Divide batter evenly between prepared pans. Bake for 15 minutes or until a toothpick inserted comes out clean. Cool in pans for 10 minutes, then transfer to a wire rack to cool completely.
- Whip Cream: In a chilled bowl, beat heavy cream, powdered sugar, and vanilla until stiff peaks form. Cover and refrigerate until ready to use.
- Assemble Cake Base: Place one cake layer on a large serving board or platter. Spread a layer of whipped cream over the top. Place the second cake layer on top and spread remaining whipped cream over the top and sides.
- Prepare Berries: Wash and dry blueberries. Hull and slice strawberries. Set aside.
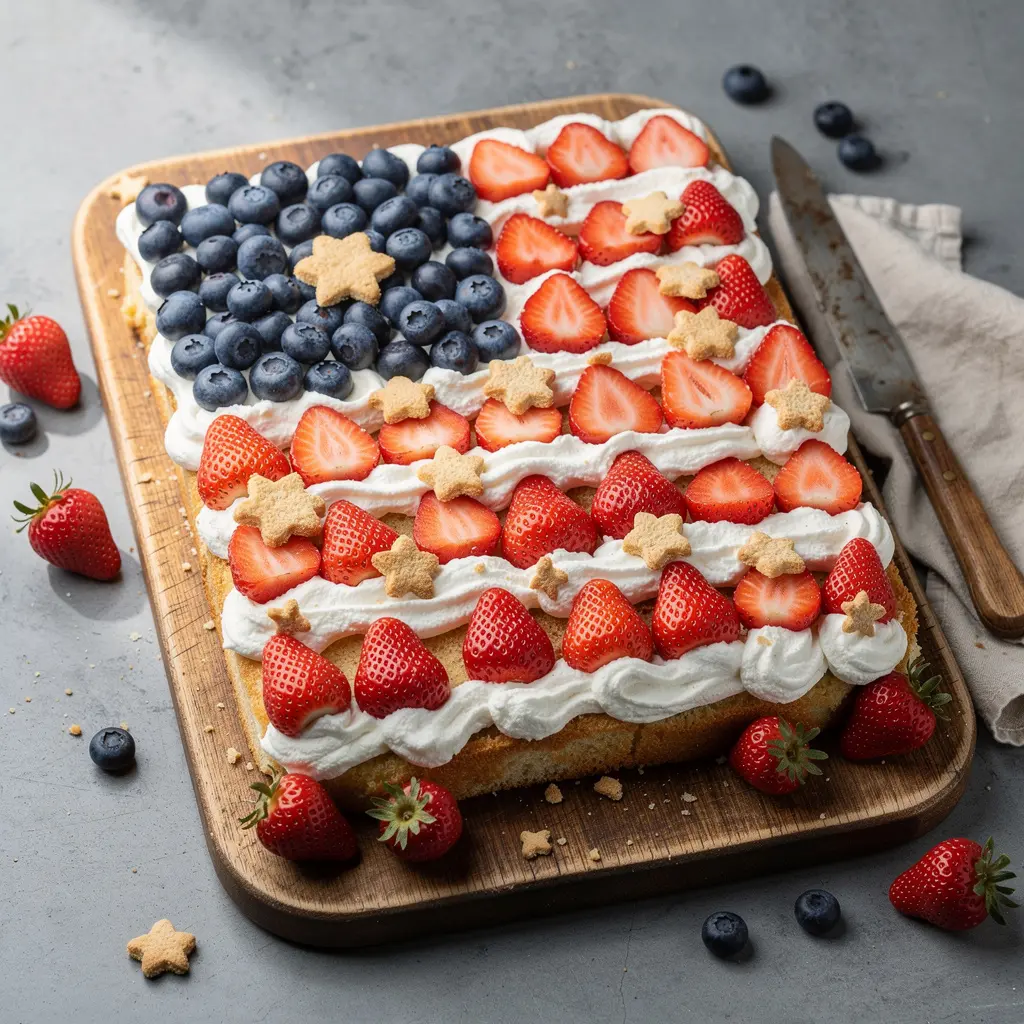
- Arrange Flag Design: Starting from the top left corner of the cake, arrange blueberries in a square to represent the blue field of stars. Create horizontal rows of strawberry slices for the red stripes, leaving space for white whipped cream stripes. Fill remaining spaces with white chocolate chips, marshmallows, licorice, and vanilla wafers to complete the flag design.
- Final Touches: Sprinkle toasted coconut around the edges of the board for a festive touch. Chill for 30 minutes before serving to set the whipped cream.